10 Best Crimping Butt Connectors for Reliable Wiring

Reliable wiring depends on more than choosing the cheapest connector in the box. Crimping Butt Connectors create secure in-line joins when matched with the correct wire size, crimping tool, and working environment. A loose connection can heat up, resist current, and fail behind a panel where inspection becomes difficult. That is why connector quality deserves careful attention.

This guide examines 10 Best Crimping Butt Connectors for Reliable Wiring, using practical criteria rather than attractive packaging. Each option is considered for crimp strength, insulation quality, moisture resistance, material durability, and ease of installation. Clear barrels, heat-shrink seals, and strong terminals can make a visible difference during real projects. Small details matter.

Hands-on testing should include firm pull checks, visual inspection, and careful crimp placement. A connector may look perfect yet fail under vibration. That happened in one early comparison. The result was a useful reminder: appearance cannot replace testing.

Wire compatibility remains essential. Some connectors suit automotive repairs, while others perform better in household, marine, or industrial applications. Temperature, humidity, movement, and available tools can change the best choice. No connector fits every situation.

The recommendations aim to help technicians, maintenance workers, and careful DIY users make informed decisions. Product claims are treated cautiously, and practical limitations are included. Even a highly rated connector needs proper preparation. Strip too much insulation, and protection is lost. Crimp unevenly, and reliability suffers.

Expect practical guidance, honest comparisons, and a few details that are easy to overlook. Reliable wiring starts with disciplined installation.
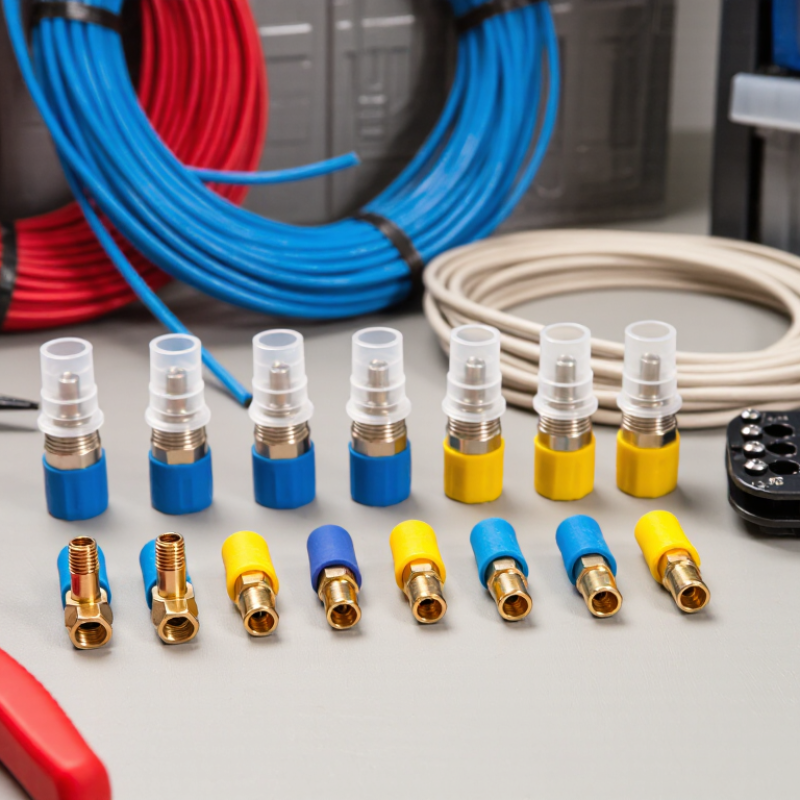
10 Best Crimping Butt Connectors for Reliable Wiring

What Are Crimping Butt Connectors and How Do They Work?

Crimping butt connectors join two wires end to end inside an insulated metal sleeve. Strip each wire to the specified length, insert one conductor into each end, then compress the barrel with a crimping tool matched to its size. The tool deforms the metal around the strands, creating a pressure-based electrical and mechanical connection. No solder is needed. A firm crimp should hold the strands without cutting them; loose strands or crushed insulation are warning signs.

The connector’s size must match both the wire gauge and the conductor material. UL 486A-486B, a recognized industry standard for wire connectors, includes mechanical pullout and temperature-rise testing. These tests matter because a joint can look neat yet loosen under vibration or heat. In practice, a clean strip, full wire insertion, and the correct die make a noticeable difference. Small details count.

After crimping, inspect both ends and give each wire a gentle pull. For critical installations, use the connector maker’s specified crimp tool and follow applicable electrical codes. A tug test is useful, but it is not a substitute for qualification testing. I’ve seen tidy-looking crimps fail when the wrong tool was used; appearance alone can be misleading.


Key Features That Define a Reliable Butt Connector

Key Features That Define a Reliable Butt Connector

A dependable crimp begins with the right fit. The connector’s barrel should match both wire gauge and conductor type, while its insulation should suit the working environment. Too much clearance can leave strands loose; an undersized barrel may damage them. A ratcheting crimper helps apply repeatable pressure, but it cannot fix a poor match. Check that the crimp is firm, evenly compressed, and free of exposed copper beyond the barrel. Small details matter.

NFPA’s Home Electrical Fires report estimated an average of 46,700 U.S. home structure fires per year involving electrical failure or malfunction from 2015 to 2019. That figure does not isolate butt connectors, but it shows why sound connections deserve care. Look for clear wire-range markings, corrosion-resistant metal, and insulation rated for the heat, moisture, and vibration expected at the installation site. For example, a damp vehicle compartment needs different protection from a dry indoor junction. Standards such as UL 486A-486B provide useful benchmarks for wire connectors. Still, a certified part can be installed badly. Pull-testing a sample connection can reveal a weak crimp, though it takes extra time—and it is easy to skip.

How to Choose the Right Connector for Wire Size and Application

Choosing a butt connector starts with the wire, not the package color alone. Check the wire gauge printed on the cable or measured with a suitable gauge tool, then match it to the connector’s stated range. A loose fit can pull apart under vibration; an oversized wire may not enter fully. Strip only the length specified by the connector maker, keeping copper strands intact. Small details matter.

Next, consider where the splice will sit. In a dry control box, an insulated nylon or vinyl connector may be adequate. Near moisture, road spray, or outdoor equipment, a sealed heat-shrink connector can help protect the joint. For higher temperatures, verify the connector’s rated temperature and insulation material rather than guessing from appearance. A red sleeve does not guarantee a particular rating.

Use a crimping tool designed for the connector type, and place its die over the metal barrel, not the plastic sleeve. After crimping, inspect both ends for exposed strands, then tug each wire firmly. It should not slide. I have seen neat-looking crimps fail because the wrong die was used; appearance can mislead. If the wire feels loose, cut the connector off and redo the splice instead of squeezing it again. That extra minute is worth it.

10 Best Crimping Butt Connectors for Reliable Wiring

Wire-size reference for choosing a butt connector: match the connector’s labeled AWG range to the wire, and confirm its insulation and temperature ratings suit the application.

Values show nominal conductor cross-sectional area for solid copper wire by AWG size; stranded-wire dimensions can differ slightly. Always follow the connector manufacturer’s wire-range and crimping instructions.

Comparison of the 10 Best Crimping Butt Connectors

A useful comparison of ten crimping butt connectors starts with wire size, barrel material, and insulation. Standard vinyl connectors are compact and affordable, but their sleeves offer limited protection from moisture. Nylon-insulated versions tolerate more heat and abrasion. For damp locations, adhesive-lined heat-shrink connectors form a tighter seal when heated evenly. They take longer to install. That matters in a crowded junction box.

The other options suit specific jobs. Non-insulated connectors fit where space is tight, but require separate insulation. Seamless copper barrels resist splitting under a sound crimp. Tinned barrels can help resist corrosion near salty air. Step-down connectors join different wire gauges; check both size ranges carefully. Parallel-splice styles accommodate multiple conductors, though they need a compatible tool. Heavy-wall connectors suit larger cables and higher mechanical demands. Closed-end sleeves are not a substitute for a proper butt splice. Finally, color-coded connectors speed up field checks, but colors vary by sizing standard.

In practice, I compare the stated wire range against the stripped conductor, then make a test crimp on scrap wire. A pull test catches loose connections. So does a close look. One limitation remains: printed specifications cannot reveal inconsistent crimping or poor installation. Choose a connector rated for the wire and environment, and use the matching die whenever possible.

Installation Steps for a Secure and Long-Lasting Crimp Connection

Installation Steps for a Secure and Long-Lasting Crimp Connection

A reliable butt splice starts with the right connector size. Match its wire range to the conductor gauge, then check that both wires fit fully inside the barrel. Cut away damaged strands with clean cutters. Strip only the length specified for the connector; exposed copper outside the barrel can invite corrosion. Keep the strands together. No fraying.

Use a crimping tool designed for the connector type and wire range. Place the barrel in the correct die, notches aligned as the tool instructions specify. Insert each wire until its insulation meets the barrel edge, then make a firm, complete crimp. A loose crimp may raise resistance; an over-crimp can damage strands. UL 486A-486B evaluates wire connectors for mechanical and electrical performance, including pullout and temperature testing. Its requirements vary by connector category, so one force value cannot safely apply to every splice.

Inspect the barrel for cracks, uneven compression, or exposed conductor, then perform a gentle pull test on each wire. For critical wiring, follow the equipment maker’s instructions and applicable workmanship criteria, such as IPC/WHMA-A-620. Add heat-shrink tubing when the installation calls for extra environmental protection, and seal it evenly without scorching the insulation. A small mistake matters. I still recheck strip length; rushing that step is easy, even with a good tool.

10 Best Crimping Butt Connectors for Reliable Wiring - Installation Steps for a Secure and Long-Lasting Crimp Connection

This guide compares common butt-connector styles rather than specific products. Wire-size ranges and temperature limits are typical examples and vary by connector; always check the connector markings, wire type, application requirements, and applicable electrical codes.

No. Connector Type Typical Wire Range Insulation / Body Best Suited For Key Consideration
1 Non-insulated copper butt splice Commonly 22–10 AWG, depending on size Bare conductive metal barrel Enclosed panels and applications where the splice will receive separate insulation Insulate the completed joint with an approved method; the connector itself provides no electrical insulation.
2 Nylon-insulated butt connector Commonly 22–10 AWG, depending on size Metal barrel with nylon insulation General-purpose wiring where an insulated splice is required Use a crimping tool matched to the connector terminal type and wire size.
3 Vinyl-insulated butt connector Commonly 22–10 AWG, depending on size Metal barrel with vinyl insulation Light-duty, dry indoor wiring within the connector’s ratings Check the temperature and voltage ratings; vinyl insulation is not automatically suitable for heat or outdoor exposure.
4 Heat-shrink butt connector Commonly 22–10 AWG, depending on size Crimp barrel with heat-shrink tubing Applications needing added environmental protection after installation Heat evenly with an appropriate heat source and follow the product instructions; heat-shrink construction alone does not establish a waterproof rating.
5 Adhesive-lined heat-shrink butt connector Commonly 22–10 AWG, depending on size Crimp barrel with adhesive-lined heat-shrink tubing Outdoor or damp locations when the connector is specifically rated for that environment Correct crimping and full, even shrinkage are essential. Confirm the environmental rating before use.
6 Step-down butt connector For joining two different wire sizes; exact ranges depend on the connector Typically insulated or non-insulated metal barrel Connecting a larger conductor to a smaller conductor in a compatible circuit Match each end to its marked wire-size range; do not force an undersized wire into the wrong barrel.
7 Heavy-wall butt splice Often used with larger conductors; size varies by design Thicker metal barrel, often with a separate or integrated insulating sleeve Higher mechanical demands or larger cable sizes when the connector is rated for the application Requires a compatible crimping die and tool; ordinary light-duty crimpers may not make an acceptable crimp.
8 Marine-grade adhesive-lined butt connector Commonly available for small and medium stranded wire sizes Corrosion-resistant barrel with adhesive-lined heat-shrink insulation Marine or similarly exposed wiring when the connector carries the required rating Use with compatible stranded wire and follow the specified crimp and sealing procedure.
9 High-temperature butt splice Varies by conductor size and connector design Temperature-rated metal barrel and insulation, if insulated Locations near heat sources when the full assembly is rated for the operating temperature Confirm the ratings of the connector, wire insulation, and any sleeve; the lowest-rated component limits the assembly.
10 Closed-end crimp splice with butt-style connection Varies; commonly offered for small-gauge conductors Metal crimp barrel with an insulating outer body Joining conductors in compact wiring assemblies where the connector is specified for that use Verify that the connector design is intended for the conductor arrangement and application; do not exceed its marked capacity.

Installation Steps for a Secure and Long-Lasting Crimp Connection

Step Action Why It Matters
1. Isolate the circuit Disconnect the power source and verify the circuit is de-energized using a suitable tester. Reduces the risk of electric shock, short circuits, and equipment damage.
2. Match the materials and sizes Choose a connector approved for the conductor material, wire gauge, application, and environment. Check its markings and instructions. A connector that is too large, too small, or incompatible with the conductor can create a weak or unsafe joint.
3. Cut and strip the wire Make a clean cut and strip only the specified length. Avoid nicking or cutting strands, and remove any damaged conductor. Intact strands and the correct strip length support a reliable crimp and proper insulation coverage.
4. Insert the conductors Insert each conductor fully into its end of the barrel, following any strip-length or insertion-depth marks. Full insertion helps ensure the barrel grips the intended conductor length.
5. Crimp with the correct tool Use a crimper and die intended for the connector style and wire size. Place the crimp in the barrel’s designated area and follow the tool or connector instructions. The correct tool and crimp position help create a secure electrical and mechanical connection.
6. Inspect and test Check that the connector is undamaged and the insulation is not trapped in the conductive barrel. Apply a firm, controlled pull test and perform any required electrical checks. Inspection can reveal incomplete insertion, a poor crimp, or damage before the wiring is put into service.
7. Seal and support the joint For heat-shrink types, shrink the tubing evenly according to the instructions. Support the wiring so the splice is not under tension or repeated flexing. Appropriate sealing and strain relief help limit moisture entry and mechanical stress.
Members of